This guide will take you through the process of making a legal aid application.
It does not take you through registering your client on the system, if you require guidance on this please see the Search Client and Create Applicant guidance.
After registering a new client (or selecting an existing client), you can create your application.
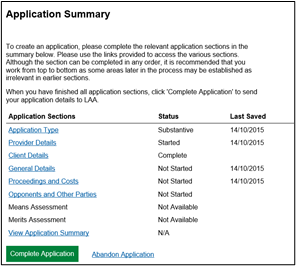
The Application Summary screen will display the current status of each section.
NOTE: All the application sections must be completed before the means and merits assessment sections become available.
Click on the link for each section to access it.
On the Provider Details screen complete the required fields.
Select a Contact Name with a SiLAS account from the list of users within the firm – the chosen contact will receive all actions and notifications relating to the case.
You can also set up a provider reference if your firm keeps its own records.
Click Confirm.

In the General Details section you can select the client’s preferred correspondence address.
If the client or provider option is selected no further information is required as the system already holds that information.
To add a correspondence only address, select Use Case Specific Address from the drop-down list.
Enter address and use Find Address button to validate the address (UK only).
Within the General Details section you will be able to link cases together. Click Link an Application/Case to add details for linked cases. When finished, or if there are no linked cases, click Confirm.
In the Proceedings and Costs section click Add Proceeding to add the details of the proceedings you want to apply for.
Select the Matter Type then the proceedings from the drop-down lists.
NOTE: For Special Children’s Act cases please select the Special Children’s Act Matter Type.
Once you have completed the proceeding information, you will be presented with a default scope limit.
NOTE: The scope limit will default to the lowest possible limitation for the selected proceeding. You can add an extra limitation if you require additional cover.
If the default scope limit is not what is required, click Add Scope Limitation which will present a free text box. Here you can include details of the work you need funding to cover.
Click Next.
You also be defaulted a cost limit based on the proceedings you have requested.
If you feel that the case will exceed this cost limit you can apply for an increase by clicking on the Case Cost Limitation link.
Enter the amount you wish to increase the cost limit to in the Requested Cost Limitation text box then click Confirm.
You will be required to justify a cost increase in the merits assessment.
Within the Proceedings and Costs section it is also possible to add a request for Prior Authority on to the application.
Select the Prior Authority Type you wish to request.
You will then be asked for some information regarding the request.
From the Application Summary screen click into the Opponents and Other Parties section to add individuals or organisations on to the application.
Click Add Individual or Add Organisation.
Complete the opponent’s (Organisation or Individual) details. Then click Search to return to a Create Application.
CCMS holds information for any previously entered organisations, so you will be able to carry out a search if you need to or Create New Organisation.
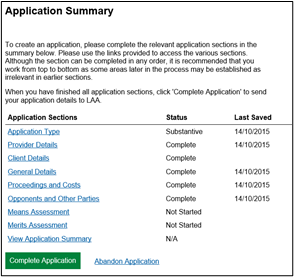
Once you have completed the set up sections of the application, the means and merits assessments will become available.
Click on Means Assessment to begin completing the means information.
See the Means and Merits Assessment Information guidance on completing the assessments.
Once all Application Sections are complete, you can either Complete or Abandon the application.
If you abandon the application that will delete all of the information input.
Click Complete Application to begin the submission process.
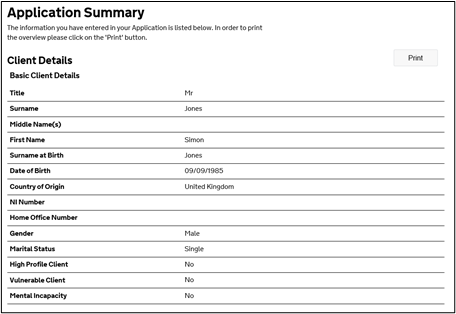
You will then see a summary of the whole application.
This is the page you should print out and get the client to sign as their declaration.
NOTE: When printing you can also choose to ‘Print to PDF’ which will save an electronic copy of the application summary to your computer.
You will be asked to confirm that you have obtained the necessary signatures before submission can be completed.
Tick the box then click Continue.
The Submission Confirmation screen confirms that the application has successfully been submitted.
You will then receive an automated action from the LAA which you can upload all supporting evidence to.