This step-by-step guide will take you through the process of uploading files and folders to Galaxkey. The guide includes information about the types of files which are accepted.
If you experience any technical issues when uploading files, contact: SFESupport@justice.gov.uk.
Step 1 (Back to top)
Once you have logged into Galaxkey, you will see your home page which shows your account and the workspaces you have been assigned. You must upload
your files to the correct workspace, so they are visible to the relevant LAA teams/individuals.
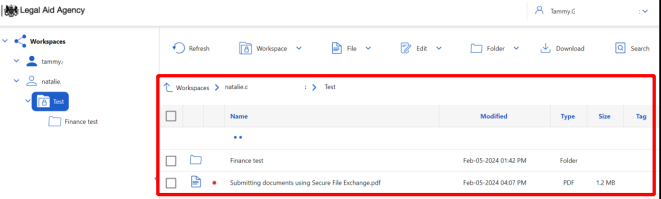
Select the workspace or use the workspace drop-down option on the left of the screen:
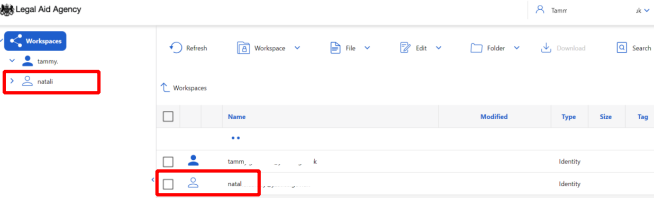
You will see your chosen workspace and any folders already uploaded.
Step 2 (Back to top)
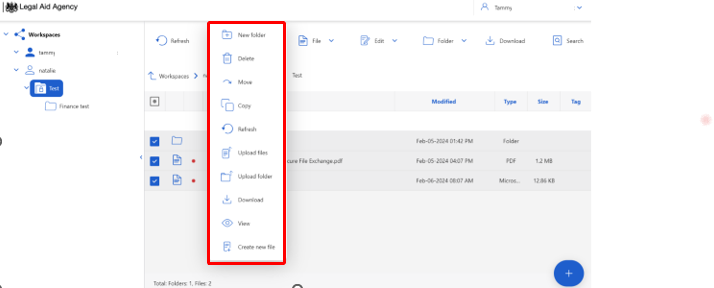
To upload a new folder/file: Click on the relevant folder (the test folder has been selected in this example). Select File. Alternatively, select + Upload in the bottom right of your screen.
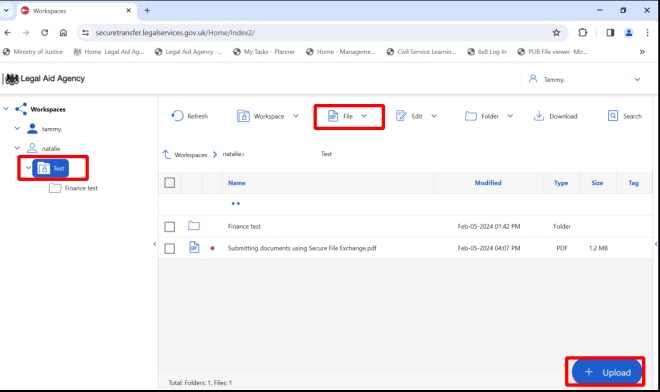
Step 3 (Back to top)
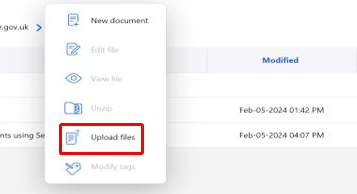
The options ‘New document’ and ‘Upload files will appear. You can either upload folders or files. Select Upload files.
Please note: All files/folders must be saved on your own device prior to beginning the upload process.
The file types accepted on Galaxkey: .docx, .doc, .pptx, .xlsx, .ppt, .xls, .pdf, .txt, htm, html, .zip, .png, .jpg, .jpeg, .bmp, .gif,.mp4, .avi, .csv, .json, .eml, .thumb, .vcf, mov, .gcache, .m4v, .tts, .m49, .caf, .mp3, .opus, .gz, .log, .m4p, .dylib, .exe, .ufdr, .ini, .msg, .xry, .rtl, .xml
Important information: If you have more than fifty (50) files to upload, we recommend you ‘zip’ them and upload as a single zip file. Avoid ‘subfolders’ if possible (as this results in a long file path).
Step 4 (Back to top)
Select Choose files:

Step 5 (Back to top)
Locate the folder / file you wish to upload. Select the file and click open:

Step 6 (Back to top)
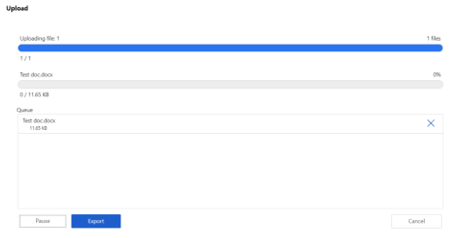
The progress bar will appear on the screen:
Step 7 (Back to top)
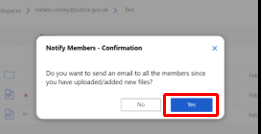
Once the upload is complete, it will appear in the workspace. You will be asked if you want to notify members of the file/folder you have uploaded: Select Yes. All members will receive a notification alerting them the files are waiting to be reviewed.
Step 8 (Back to top)
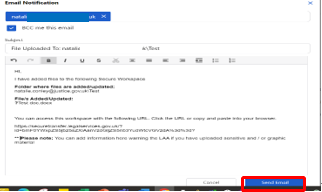
You will see the workspace LAA email address and the message to be sent. You can make amendments to the email, for example, to inform the recipient there is sensitive/graphic material. Select ‘Send email’.
Step 9 (Back to top)
Once uploaded, you can delete, rename, copy, or move files by right clicking on the file in the workspace: